


Votes - 9, Average rating: 4.6
(
 )
)
)
|
Photos and specs Pioneer DEH-1200MP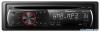 |


manual abstract
It is especially important that you read and observe WARNINGs and CAUTIONs in th is manual. Please keep the manual in a safe and accessible place for future reference. 0 If you want to dispose this product, do not mix it with general household waste. There is a separate collection system for used electronic products in accordance with legislation that requires proper treatment, recovery and recycling. Private households in the member states of the EU, in Switzerland and Norway may return their used electronic products free of charge to designated collection facilities orto a retailer (if you purchase a similar new one). For countries not mentioned above, please contact your localauthorities forthe correct method of disposal. By doing so you willensurethatyourdisposed product undergoes the necessary treatment, recovery and recycling and thus prevent potentialnegative effects on the environment and human health. 0 Middle East, Africa and Oceania. Use in other areas may result in poor reception. The RDS (radio data system) function operates only in areas with FM stations broadcasting RDS signals. A CAUTION • Do not allow this unit to come into contact with liquids. Electrical shock could result. Also, damage to this unit, smoke, and overheating could result from contact with liquids. • "CLASS 1 LASER PRODUCT" This product contains a laser diode of higher class than 1. To ensure continued safety, do not remove any covers or attempt to gain access to the inside of the product. Refer all servicing to qualified personnel. • The Pioneer CarStereo-Pass is for use only in Germany. • Always keep the volume low enough to hear outside sounds. • Avoid exposure to moisture. • If the battery is disconnected or discharged, any preset memory will be erased. 0 In case of trouble Should this product failto operate properly, please contact your dealer or nearest authorized Pioneer Service Station. 0 About this unit The tuner frequencies on this unit are allocated for use in Western Europe, Asia, the CD En ( Operating this unit Section )€l 2 Head unit Button Button © F (function) ® Detach © EQ/LOUD © AUX input jack (3.5 mm stereo jack) © SRC/OFF © TA/AF ® 1 to 6 b DISP/SCRL 5 Disc loading slot © a/b/c/d 6 h (eject) © BAND/ESC © A (audio) a Display indication Indicator State o Main display section • Tuner: band and frequency • RDS: program service name, PTY information and other literal information • Built-in CD player: elapsed playback time and text information 2 Preset number/ track number • The track number or preset number. • If a track number 100 or more is selected, ► on the left of the track number indicator will light. 3 AF AF (alternative frequencies search) function is on. 4 TP A TP station is tuned in. 5 TA TA function is on. 6 MP3/ WMA The type of the currently playing disc. 7 RPT Repeat play is turned on. 8 LOUD Loudness is on. 9 5 (stereo) The selected frequency is being broadcasted in stereo. a LOC Local seek tuning ison. S Basic Operations Important • Handle gently when removing or attaching the front panel. • Avoid subjecting the front panel to excessive shock. • Keep the front panel out of direct sunlight and high temperatures. • Remove any cables and devices attached to this unit before detaching the front panel to avoid damage to the device or vehicle interior. En CD English Section 02^ ( Operating this unit ) Removing the front panel to protect your unit from theft 1 Press detach to release the front panel. 2 Grab the front panel and remove. 3 Put the front panel into the provided protective case for safe keeping. Re-attaching the front panel 1 Slide the front panel to the left until it clicks. Front panel and the head unit are connected on the left side. Make sure that the front panel has been properly connected to the head unit. 2 Press the right side of the front panel until it is firmly seated. If you can't attach the front panel to the head unit successfully, try again. However, forcing the front panel into place may result in damage. Turning the unit on 1 Press SRC/OFF to turn the unit on. Turning the unit off 1 Press SRC/OFF and hold until the unit turns off. Selecting a source 1 Press SRC/OFF to cycle between: TUNER (tuner)—CD (built-in CD player)—AUX (AUX) Adjusting the volume 1 Turn SRC/OFF to adjust volume. Note When this unit's blue/white lead is connected to the vehicle's auto-antenna relay control terminal, the vehicle's antenna extends when this unit's source is turned on. To retract the antenna, turn the source off. 0 Menu operations identical for function settings/audio adjustments/initial settings Returning to the ordinary display Canceling the initial setting menu 1 Press BAND/ESC. You can also cancel initial settings by holding down SRC/OFF until the unit turns off. s Tuner Basic Operations Selecting a band 1 Press BAND/ESC until the desired band (F1, F2 for FM or MW/LW) is displayed. Manual tuning (ste...
Other models in this manual:Car Receivers - DEH-1220MP (1.75 mb)