


Votes - 5, Average rating: 3.4
(


 )
)
|
Photos and specs Canon Digital IXUS 700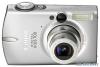 |


Other manuals for this model:
manual abstract
You can erase incompatible sound data using the camera. • Sound memos for protected images cannot be erased. The volume can be adjusted in the (Set up) menu (p. 54). 125 Automated Playback (Slide Shows) Starting a Slide Show A selection of images or all the images on an SD card can be displayed one- by-one in an automated slide show. Slide show image settings are based on DPOF standards (p. 136). All Images Plays all images on the SD card in order. Slide Show 1-3 Plays the images selected for each slide show in order (p. 127). 1In the (Play) menu, select and press the FUNC./SET button. •See Selecting Menus and Settings (p. 47). • The Slide Show menu will display. 2 Use the button to select button select 3 The slide show starts. The Slide Show menu will reappear after the playback ends. 4 Press the MENU button. The display will return to the Play menu. Pressing the MENU button again returns to the playback screen. • Movies play for their entire recorded length regardless of the time set in the slide show settings. • The power-saving function does not activate during a slide show (p. 55). Pausing/Resuming a Slide Show Press the FUNC./SET button. The slide show pauses. Press the FUNC./ SET button again to restart it. Playback Fast Forwarding/Rewinding a Slide Show Stopping button. image displays. Hold down the button to advance through the the MENU button. and the Slide Show menu reappears. Selecting Images for Slide Shows You can mark images for inclusion in slide shows 1-3. Up to 998 images may be marked per slide show. Images display in the order of their selection. 1 Display the Slide Show menu. See Starting a Slide Show (p. 126). 127 2Use the button to select button to ], [Show 2] or [Show 3]. beside a containing images. FUNC./SET button. ou can select all the images by choosing All Images, pressing the FUNC./SET button and selecting [OK] in the next screen. 4Select images for the Slide Show the button to move to an age and the esponding to their selection order and display a number Selected imageNC./SET button to select or deselect it. a checkmark can press the zoom lever toward to switch to the index mode (9 images) and use the same procedures to select images. 5Press the MENU button. Press the MENU button repeatedly until the Playback screen reappears to finish the procedure. 4Select images for the Slide Show the button to move to an age and the esponding to their selection order and display a number Selected imageNC./SET button to select or deselect it. a checkmark can press the zoom lever toward to switch to the index mode (9 images) and use the same procedures to select images. 5Press the MENU button. Press the MENU button repeatedly until the Playback screen reappears to finish the procedure. Adjusting the Play Time and Repeat Settings You can change the play time for all the images in a show and have the show repeat continuously. Play Time Sets the duration that each image displays. Choose between 3-10 seconds, 15 seconds, 30 seconds and Manual. Repeat Sets whether the slide show stops when all the slides have been displayed or continues until stopped. 1 Display the Slide Show menu. See Starting a Slide Show (p. 126). Playback 2button to s the button to select 4ss the MENU button. The set up menu will close. Pressing the MENU button again returns to the Play menu. Press it again to go back to the playback screen. • The display interval may vary slightly from the set time for some images when played. • Slide shows are easy to arrange on a computer with the supplied software (ZoomBrowser EX/ImageBrowser). See the Canon Digital Camera Software Starter Guide Disk. Protecting Images You can protect important images and movies from accidental erasure. 1In the 2Use the (Play) menu, select and press the FUNC./SET button. See Selecting Menus and Settings (p. 47). button to select an image to protect and press the FUNC./SET button. • The pears on protected images. • You can make the selection of images easier by toggling between single image playback and index playback by pressing the zoom lever toward or . Protection Icon 3 Press the MENU button. The Play menu displays again. Press it again to return to the playback screen. To Cancel Protection After step 1, select an image to remove protection from and press the FUNC./SET button. Please note that formatting (initializing) an SD card erases all data, including protected images (p. 26). Erasing Erasing Single Images • Please note that erased images cannot be recovered. Exercise adequate caution before erasing an image. • Protected images cannot be erased with this function. 1Us2 button to select an image for deletion and press the Erasing button to select ] and press the FUNC./SET asing, select [Cancel]. Erasing All Images You can erase all the images saved on the SD card. • Please note that erased images cannot be recovered. Exercise adequate caution before erasing an image. • Protected images cannot be erased with this function. 1In the (Play) menu, selec...