


Votes - 2, Average rating: 4.5
(

 )
)
|
Photos and specs Samsung HMX-H400BP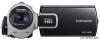 |


Other manuals for this model:
Cameras - HMX-H400BP (5.75 mb)
Cameras - HMX-H400BP (5.76 mb)
Cameras - HMX-H400BP (5.89 mb)
manual abstract
Each file is given a unique file number that allows convenient image management on a PC. Reset: Resets the file number to 0001 after you format the memory card, delete all files, or insert a new memory card. • • When you set “File No.” to “Series,” the camcorder assigns each file a different number to avoid duplicating file names. This is useful when you want to manage your files on a computer. Time Zone You can set the clock to the local time when using your camcorder in a different time zone. Setting the local time 1. Touch the Menu ( ) tab • Setting ( ) tab “Time Zone” “Visit.” 2. Touch the left ( ) or the right ( ) tab to select the visited area. 3. Touch the ( ) tab when the time zone setting is complete. • The camcorder does not apply the time zone you set if you finish the setting by touching the ( ) tab without touching the ( ) tab. Home Visit Time Zone 1/1 Visit [HOME 00:00] 01/JAN/2012 00:00 London,Lisbon Submenu items Home: The camcorder displays the time according to your settings on the Date/Time Set menu. Select Home when using the camcorder for the first time or when returning the clock to your hometown date/time setting. Visit ( ): When you visit a local in a different time zone, the Visit function allows you to use the local time without changing your hometown time setting. The camcorder adjusts the clock in accordance with the time difference between the two locations. • • System setting Date/Time Set By setting the date and time, you can display the date and time of the recording during playback. page 31 ) or Return ( ) tab. 1/1 2012/01/01 JAN/01/2012 01/JAN/2012 01/01/2012 Date Type Date/Time Set Month Hr Min Day Year / : 01 00 00 JAN 2012/ Date Type You can set the display format for the date. 1. Touch the Menu ( ) Setting ( ) tab “Date Type.” 2. Touch the desired submenu item. 3. To exit the menu, touch the Exit ( Submenu items 2012/01/01: Displays the date in the year/month (two-digit)/ day format. JAN/01/2012: Displays the date in the month/day/year format. 01/JAN/2012: Displays the date in the day/month/year format. 01/01/2012: Displays the date in the day/month (two-digit)/ year format. • • • • This function depends on the “Date/Time Display” setting. page 81 Time Type You can set the display format for the time. 1. Touch the Menu ( ) Setting ( ) tab “Time Type.” 2. Touch the desired display option. 3. To exit the menu, touch the Exit ( ) or Return ( ) tab. 12 Hr 24 Hr Time Type 1/1 Submenu items 12Hr: Displays the time information in 12 hour units. 24Hr: Displays the time information in 24 hour units. • • This function depends on the “Date/Time Display” setting. page 81 System setting Date/Time Display You can set whether or not the date and/or time are displayed on the LCD screen. Before you use the “Date/Time Display” function, you must set the date and time. page 31 1. Touch the Menu ( ) Setting ( ) tab “Date/Time Display.” 2. Touch the desired submenu item. 3. To exit the menu, touch the Exit ( ) or Return ( ) tab. • The date/time is displayed on the LCD screen according to the selected option. 1/1 Off Date Time Date & Time Date/Time Display Submenu items Off: Current date/time information is not displayed. Date: Displays the current date. Time: Displays the current time. Date & Time: Displays the current date and time. • • • • • The date/time will read “01/JAN/2012 00:00” in the following case: - When the internal rechargeable battery is depleted. • This function depends on the “Date Type” and “Time Type” setting. page 80 System setting Auto LCD Off To reduce power consumption, the camcorder automatically dims the brightness of the LCD screen if the camcorder is idle for a period of time. 1. Touch the Menu ( ) Setting ( ) tab “Auto LCD Off.” 2. Touch the desired submenu item. 3. To exit the menu, touch the Exit ( ) or Return ( ) tab. Off On Auto LCD Off 1/1
Cameras - HMX-H405BP (5.83 mb)
Cameras - HMX-H430BP (5.83 mb)
Cameras - HMX-H440BP (5.83 mb)