


Votes - 7, Average rating: 4.3
(

 )
)
|
Photos and specs Citizen CL-S700R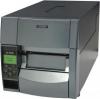 |


manual abstract
Set the media roll and media holder in to the printer as shown above. It is advisable to pull a length of media forwards and through the mechanism ready for later positioning. 5. Move the media roll so it is touching the left side of the housing. Then slide the black movable media guide so it is touching the media on the right side. Note: Do not try to hold the media too tightly with these guides as it will cause the printer to jam during printing. 6. Align the media with the left fixed media guide (2 locations), align the right movable media guide with the media width, and lower the sensor arm which loosely holds the media in position. Fixed media guide Sensor arm Movable media guide 7. Lower the head unit back down to the closed position. Push the head close knob firmly to close and lock the mechanism. The mechanism is only locked correctly when you head a “click”. Align it with the width of the media that has been set, then set the media width adjustment screw and the media thickness adjustment knob. See “Chapter 3 Printer Adjustments”. Head close knob Media width adjustment knob Media thickness check window Media thickness adjustment screw Media width check window Head unit Media Thickness Adjustment (p.57) Media Width Adjustment (p.58) 8. With the power switched on, push the FEED key to feed the media. It will halt at the next print start position. 27 Printer Operation Setting the Media Using the Rewinder as a Peeler (CL-S700R models/Peeling Mode) 1. Ensure that the optional rewinder paper guide is not installed. 2. Open the rewinder cover and remove the rewinder flange. Rewinder flange 3. Pull out approximately 40cm length of the media from the head unit. Media Approx. 40cm 4. Peel off a number of labels at the tip part of the media from the liner so that the liner unit is in contact with the peeler roller when closing the rewinder cover. 2 Printer Operation 28 Setting the Media 5. Insert the end of the liner in to the slot in the rewinder flange and wind the liner on to itself with two or three turns to ensure it is held properly. Set the rewinder flange back in to the printer. 6. Confirm that the liner unit is in place in the peeler roller and close the rewinder cover. Roller Media Liner Rewinder flange Media Media Caution When closing the rewinder cover, be careful not to catch any foreign objects or fingers in the mechanism. Installing the Media (P.25) 29 Printer Operation Setting the Media Using the Rewinder for Batches of Printed Media (CL-S700R models/Rewind Mode) The optional Rewinder Paper Guide is necessary for batch mode rewinding. The optional Adjustable Rewinder Flange is necessary if a paper core is to be installed to receive the media. 1. Hook the rewinder paper guide on the top of the rewinder cover. 3. Open the rewinder cover and remove the rewinder flange. Media enter slit cover Rewinder flange 2. Slide the media enter slit cover above the rewinder cover to the left or right while pressing down on its center and remove. Rewinder paper guide 2 Printer Operation 30 6. Insert the end of the media in to the slot in the rewinder flange and wind the media on to itself with two or three turns to ensure it is held properly. Set the rewinder flange back in to the printer. Rewinder paper guide Rewinder flange Setting the Media 5. Insert the tip of the media through the media enter slit from the external side of rewinder cover. 4. Pull out approximately 80cm length of media from the head unit. Media Approx. 80cm Media enter slit Printer Operation 7. If the optional adjustable rewinder flange is being used with a paper core, the media can be attached to the paper core directly with tape or glue. Then the flange is set in the printer. For details on installing and removing the cardboard refer to the instructions contained with the adjustable flange. Rewinder paper guide Rewinder flange Media Paper core 31 2 Printer Operation Setting the Ribbon The following kinds and sizes of ribbons can be used. Types ......................................................Inside wound and outside wound ribbon Max. ribbon width ...............................114.0 mm (4.50 inch) Min. ribbon width................................25.4 mm (1.00 inch) Max. ribbon length..............................450.0 m (1,476 ft) Max. roll diameter ...............................86.5 mm (3.40 inch) Inner diameter of the paper core .... 25.4 ± 0.25 mm (1.00 ± 0.01 inch) Lead tape length..................................Less than 80.0 mm Setting method 1. Place the attached ribbon and paper core separately on one of the two attached ribbon holders. Insert the two ribbon holders into the ribbon and paper cores ensuring that they are pushed in all the way. Ribbon holders Paper core Ribbon 2. Install the unused ribbon and holder in to the rear ribbon drive unit. The splines on the ribbon drive gear mechanism engage with the end of the ribbon holder. 32 12 33 Printer Operation 3. Push the large blue head-open lever to release the head un...
Other models in this manual:Shop Equipment - CL-S700 (1.9 mb)
Shop Equipment - CL-S703 (1.9 mb)