


Votes - 1, Average rating: 3
(

 )
)
|
Photos and specs Sony KDL-40S5600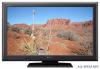 |


Other manuals for this model:
Televisions - KDL-40S5600 (4.92 mb)
Televisions - KDL-40S5600 (4.64 mb)
Televisions - KDL-40S5600 (4.13 mb)
Televisions - KDL-40S5600 (3.71 mb)
manual abstract
“Standard”: Default settings. “Reduce”: Reduces the power consumption of the TV. “Picture Off”: Switches off the picture. You can listen to the sound with the picture off. Idle TV Standby Selects the time (“1h”, “2h” or “3h”) to set the TV into standby mode automatically, if you do not operate the TV for the specified period of time. PC Power When this is set to “On,” turns to standby mode if no PC signal is received. Only Management available in PC input. Reset Resets all the “Eco” settings to the factory settings. Features Screen Format Changes the screen format. For details about the screen format, see page 13. Screen Format (only in PC mode) “Normal”: Displays the picture in its original size. “Full”: Enlarges the picture to fill the display area. RGB Centre Adjusts the horizontal picture position so that the picture is in the middle of the screen. z • This option is only available if an RGB source has been connected to the Scarts connectors / / AV1 or / / AV2 on the rear of the TV. PC Adjustment Customizes the TV screen as a PC monitor. z • This option is only available if a PC signal is received. “Phase”: Adjusts the screen when a part of a displayed text or image is not clear. “Pitch”: Enlarges or shrinkes the screen size horizontally. “Horizontal Shift”: Moves the screen to the left or to the right. “Vertical Shift”: Moves the screen up or down. “Reset”: Resets to the factory settings. Sleep Timer Sets a period of time after which the TV automatically switches itself into standby mode. When the “Sleep Timer” is activated, the (Sleep Timer) indicator on the TV front panel lights up in orange. z • When you turn off the TV and turn it on again, “Sleep Timer” is reset to “Off”. • A notification message appears on the screen one minute before the TV switches to standby mode. Using MENU Functions 23 GB Display Area Adjusts the picture display area. “Full Pixel”: Displays pictures in their original size when parts of the picture are cut off. “Normal”: Displays pictures in their recommended size. ~ • These options may change depending on the input displayed. Set-up Auto Start-up Starts the initial set-up to select the language, country/region and location, and tune in all available digital and analogue channels. Usually, you do not need to do this operation because the language and country/region will have been selected and channels already tuned when the TV was first installed (page 7). However, this option allows you to repeat the process (e.g., to retune the TV after moving house). Language Selects the language in which the menus are displayed. Auto Tuning (Only in analogue mode) Tunes in all the available analogue channels. Usually you do not need to do this operation because the channels are already tuned when the TV was first installed (page 7). However, this option allows you to repeat the process (e.g., to retune the TV after moving house, or to search for new channels that have been launched by broadcasters). Programme Sorting (Only in analogue mode) Changes the order in which the analogue channels are stored on the TV. 1 Press F/f to select the channel you want to move to a new position, then press g. 2 Press F/f to select the new position for your channel, then press . AV Preset Assigns a name to any equipment connected to the side and rear sockets. The name will be displayed briefly on the screen when the equipment is selected. 1 Press F/f to select the desired input source, then press . 2 Press F/f to select the desired option below, then press . • AV1 (or AV2/AV3/HDMI1/HDMI2/HDMI3/Component/PC), VIDEO, DVD, CABLE, GAME, CAM, SAT: Uses one of the preset labels to assign a name to connected equipment. • “Edit”: Creates your own label. 1 Press F/f to select the desired letter or number (“_” for a blank space), then press g. If you input a wrong character Press G/g to select the wrong character. Then, press F/f to select the correct character. 2 Repeat the procedure in step 1 until the name is completed, then press . HDMI Set-up Allows the TV to communicate with equipment that is compatible with the control for HDMI function, and connected to the HDMI sockets of the TV. Note that communication settings must also be made on the connected equipment. “Control for HDMI”: Sets whether or not to link the operations of the TV and the connected equipment that is compatible with control for HDMI. “Auto Devices Off”: When this is set to “On”, the connected equipment that is compatible with control for HDMI turns off when you switch the TV to standby mode using the remote. 24 GB “Auto TV On”: When this is set to “On”, the TV turns on when you turn on the connected equipment that is compatible with control for HDMI. “Device List Update”: Creates or updates the “HDMI Device List”. Up to 11 compatible equipment items can be connected, and up to 5 equipment items can be connected to a single socket. Be sure to update the “HDMI Device List” when you change the connections or settings. “HDMI Device List”: Displays...
Other models in this manual:Televisions - KDL-32P3600 (912.64 kb)
Televisions - KDL-32P5600 (912.62 kb)
Televisions - KDL-37P3600 (912.62 kb)
Televisions - KDL-37P5600 (912.62 kb)