


Votes - 2, Average rating: 4.5
(

 )
)
|
Photos and specs Hyundai H-LCD800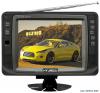 |


manual abstract
The screen displays TV/AV or S-video mode at the upper right corner each time SOURCE is pressed. NOTES: AV and S-video use the same Audio input socket. 5 3. Sound Volume Press the VOL (+) to increase sound volume. The segment of indicator increases. Press the VOL (-) to decrease sound volume. The segment of indicator decreases. volume | 50 To mute sound Press the MUTE to temporarily turn off the sound. Screen display MUTE MARK. *1 Press the MUTE or VOL (+)/(-) to turn the sound back to the previous level. ON/OFF Standby To turn off the LCD TV: Press the POWER button. To turn the LCD TV back on: Press the POWER button again after 3 seconds. Note: If press the power button to turn off the LCD TV then press the power button again in 3 seconds, you should press the power button twice to turn the LCD TV back on. 4. Changing the channel Changing channels using the channel digit selecting button on the remote control. To handle the increasing number of channels available, this LCD TV set allows you to select up to 136 positions(Channels 0 to 135). Follow the procedure shown below to select channels. To select a one-digit channel (e.g channel 6). l.Press the 6 button. 2.Or press 0 + 0 + 6 buttons. To select a two-digit channel (e.g channel 26) l.Press the 2 + 6 buttons. 2.Or press 0 + 2 + 6 buttons. To select a three-digit channel (e.g channel 135) l.Press the 1 + 3 + 5 buttons. Changing channels with the CH (+)/(-) buttons Press the CH (+) and the channels change in the order shown below: 1 ^ 2 ^ 3....133 ^ 134 ^ 135 ^ 0 ^ 1 ^ 2..... Press the CH (-) and the channels change in the order show below: 3 ^ 2 ^ 1 ^ 0 ^ 135 ^ 134.....3 ^ 2 ^ 1 6 5. Menu operation This LCD TV set allows you to adjust the picture and set the channels and other features using the on screen Display. Select the desired menu item by i following the steps below and then refer to the indicated page for details. 1. Press the MENU once to display the picture menu screen. 2. Press the MENU again to display the channel menu screen. 3. Press the CH (+)/(-) to select the desired adjustment item. 4. Press the VOL (+)/(-) to make adjustment. a. Image Adjustment 1. Press the MENU to display the picture menu screen. 2. Press the CH (+)/(-) to select the desired adjustment item. 3. Press the VOL (+)/(-) to make adjustment. Selected item Press the VOL (-) Press the VOL(+) Brightness Less bright More bright Coutrast Decrease coutrast Increase contrast Sharpness Normal ^ sharp ^ sharpest ^ softest ^ soft I i Color Lower color intensity Higher color intensity Tint Toward purple Toward green Picture 20 -0- Contrast ^43 m Sharpness Color 1 50 ■ Tint 50 b) Preset function adjustment Presetting the channels (AUTO search) 1. Press the MENU twice, the channel menu screen appears. 2. Press the CH (+)/(-) to select AUTO searching item. 3. Press the VOL (+)/(-). All the TV stations in your area that can be received by the LCD TV set are automatically preset between channels 1 tol3 5. 4.The screen shows whatever is on channel 1 when full auto channel preset is finished. 7 Channel Sound system Auto search Manualsearch Fine tune Channel skip Current Channel I