


Votes - 5, Average rating: 3.6
(

 )
)
|
Photos and specs Citizen CT-S651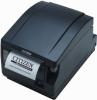 |


manual abstract
For information on how to save data, refer to the Command Reference. • Memory switch Setting of various kinds of functions can be stored in memory. Settings remain stored in the memory even if the printer is turned off. —16— 3. SETUP 3.1 Connecting the AC Power Cord 1. Turn off the power. 2. • For the built-in power type printer, connect the AC power cord to the AC inlet, and insert the plug into an electric outlet. • For the AC adapter type printer, connect the cable connector of the AC adapter to the power connector. Next, connect the AC power cord to the AC inlet, and insert the plug into an electric outlet. AC inlet AC power cord Power connector AC inlet AC adapter Cable connector AC power cord Built-in power supply type AC adapter type CAUTION • Use only an AC adapter that complies with the specified ratings. • Always hold the AC adapter’s cable connector by the connector when removing or inserting it. • Use an AC power source that does not also supply power to equipment that generates electromagnetic noise. • Pulling on the AC power cord may damage it, cause a fire, electric shock, or break a wire. • If a lightning storm is approaching, unplug the AC power cord from the electric outlet. A lightning strike may cause a fire or electric shock. .. Keep the AC power cord away from heat generating appliances. The insulation on the AC power cord may melt and cause a fire or electric shock. • If the printer is not going to be used for a long time, unplug the AC power cord from the electric outlet. • Place the AC power cord so that people do not trip on it. —17— 3.2 Connecting Interface Cables 3.2 Connecting Interface Cables 1. Turn off the power. 2. Orient the interface cable correctly and insert it into the interface connector. Serial interface Parallel interface USB interface (hub type) USB interface Front view Pin Ethernet interface Powered USB interface —18— CAUTION • Always unplug the AC adapter from the printer before connecting the printer to a Powered USB interface. Failure to do so may damage the host PC. For information about installing a Powered USB interface, contact your Citizen Systems dealer. • Check the orientation of the Powered USB cable connector before connecting it. Insert it straight in so that the pins do not bend. Push it in until it clicks. • When disconnecting the cable, always hold the connector. • Be careful not to insert the USB interface cable into the cash drawer kick-out connector. • To connect more than one printer to a single computer via a USB interface you must change the serial number of the USB interface. • Hold the connector of the Ethernet interface cable perpendicular and straight when connecting or disconnecting it. Doing it at an angle may cause the connector to misconnect. Use a serial interface cable with the connection layout shown below. 25-pin - 25-pin cable 9-pin - 25-pin cable PC Printer PC Printer Signal Pin Pin Signal FG 1 1 FG TXD 2 2 TXD RXD 3 3 RXD CTS 5 4 RTS DSR 6 6 DSR SG 7 7 SG DTR 20 20 DTR Signal Pin Pin Signal RXD 2 2 TXD TXD 3 3 RXD DTR 4 4 RTS SG 5 6 DSR DSR 6 7 SG CTS 8 20 DTR CAUTION Place the interface cable so people do not trip on it. —19— 3.3 Connecting the Cash Drawer 3.3 Connecting the Cash Drawer 1. Turn off the power. 2. Confirm the orientation of the cash drawer kick-out cable connector and connect it to the cash drawer kick-out connector at the back of the printer. 3. Remove the screw for the ground wire. 4. Screw the cash drawer’s ground wire to the body of the printer. Cash drawer kick-out connector Cash drawer kick-out cable connector Ground wire Screw for ground wire CAUTION • Connect only the cash drawer kick-out cable connector to the cash drawer kick-out connector. (Do not connect a telephone line.) • Signals cannot be output from the cash drawer kick-out connector while printing. • Hold the connector of the drawer kick cable perpendicular and straight when connecting or disconnecting it. Doing it at an angle may cause the connector to misconnect. —20— (1) Connector pin configuration No. Signal Function 1 FG Frame ground 2 DRAWER1 Cash drawer 1 drive signal 3 DRSW Cash drawer switch input 4 VDR Cash drawer drive power supply 5 DRAWER2 Cash drawer 2 drive signal 6 GND Signal ground (common ground on circuits) Connector used: TM5RJ3-66 (Hirose) or equivalent Applicable connector: TM3P-66P (Hirose) or equivalent (2) Electric characteristics 1) Drive voltage: 24 VDC 2) Drive current: Approx. 1 A max. (not to exceed 510 ms.) 3) DRSW signal: Signal levels: “L” = 0 to 0.8 V, “H” = 2 to 3.3 V (3) DRSW signal DRSW signal status can be tested with the DLE+EOT, GS+a, or GS+r command or at pin 34 on the parallel interface port. (4) Drive circuit Cash drawer kick-out connector Cash drawer open/ close switch Shielded Cash drawer Printer CAUTION • Cash drawers 1 and 2 cannot be operated at the same time. • The solenoid used for the cash drawer should be 24 . or more. Do not allow the electric current to exceed 1 A. Excessive current could dam...