


Votes - 4, Average rating: 4.5
(

 )
)
|
Photos and specs Sony CMT-NE3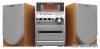 |


manual abstract
Tips •The ?/1 indicator lights up even in Power Saving Mode. • The timer continues to operate in Power Saving Mode. Note You cannot perform the following operations in Power Saving Mode. – setting the clock – changing the AM tuning interval Viewing information about the disc in the display You can check the playing time and remaining time of the current track or that of the disc. When a disc with MP3 audio tracks is loaded, you can also check the information recorded on disc, such as the titles. Checking the remaining time and titles (CD/MP3) Press DISPLAY repeatedly during Normal Play. Each time you press the button, the display changes cyclically as follows: Current track number and elapsed playing time t Current track number and remaining time or “– –.– –”* t Remaining time of the disc or “– –.– –”* t Track title (disc with MP3 audio tracks** only) t Album name* t Clock display * “– –.– –” appears when you select a CD track whose number is 21 or over, or when you select an MP3 audio track (CMT-NE5 only). ** When you play back a track with an ID3 tag, the ID3 tag appears. The ID3 tag displays only the track title information. Checking the total playing time and titles (CD/MP3) Press DISPLAY repeatedly in stop mode. Each time you press the button, the display changes cyclically as follows: TOC display* or total number of albums on the disc** or total track number of the current album** t Album name** t Clock display * TOC = Table of Contents; displays current disc number, total number of tracks on the disc and total playing time of the disc. ** For discs with MP3 audio tracks, album titles may not be displayed depending on the play mode (CMT-NE5 only). 20GB Optional analog component Optional analog component Optional Components Hooking up optional components To enhance your system, you can connect optional components. Refer to the operating instructions provided with each component. From the audio output jacks of an optional analog component Display/ Optional Components A MD jacks Use audio cords (not supplied) to connect an optional analog component (MD deck, etc.) to these jacks. You can then listen to the sound from the component. Listening to audio from a connected component 1 Connect audio cords. See the illustration above. 2 Press FUNCTION repeatedly until “MD” appears. Start playing the connected component. Recording audio from a connected component 1 Connect audio cords. 2 Start recording manually. See “Recording on a tape manually” on page 16. 21GB Troubleshooting Problems and remedies Should you encounter a problem with your system, do the following: 1 Make sure the power cord and speaker cords are correctly and firmly connected. 2 Find your problem in the troubleshooting checklist below and take the indicated corrective action. If the problem persists after doing all of the above, consult your nearest Sony dealer. When the ?/1 indicator flashes Immediately unplug the power cord and check the following items. • If your system has a voltage selector, is the voltage selector set to the correct voltage? • Check the voltage for your region, then make sure the voltage selector is set correctly. Check all the above items and fix any problems found. After ?/1 indicator stops flashing, reconnect the power cord and turn on the system. If the indicator still flashes, or if the cause of the problem cannot be found even after checking all the above items, consult your nearest Sony dealer. General “– –:– –” appears in the display. • A power interruption has occurred. Set the clock (page 8). There is no sound. • Press VOLUME + on the remote repeatedly (or turn VOLUME on the unit clockwise). • Make sure the headphones are not connected. • Check the speaker connections (page 6). Sound comes from one channel, or unbalanced left and right volume. • Place the speakers as symmetrically as possible. • Connect the supplied speakers. There is severe hum or noise. • Move the system away from the source of noise. • Connect the system to a different wall outlet. • Install a noise filter (commercially available) to the power line. The timer cannot be set. • Set the clock again (page 8). The timer does not function. • Press CLOCK/TIMER SELECT on the remote to set the timer and light up “cPLAY” or “c REC” in the display (pages 18 and 19). • Check the timer setting and set the correct time (pages 18 and 19). • Cancel the Sleep Timer function (page 17). • Make sure the clock is correctly set. The color on the TV screen is irregular. • Move the speakers farther away from the TV set. The remote does not function. • Remove the obstacle. • Move the remote closer to the system. • Point the remote at the system’s sensor. • Replace the batteries (R6/size AA). • Locate the system away from the fluorescent light. Speakers Sound comes from one channel, or the left and right volumes are unbalanced. • Check the speaker connections and placement. CD/MP3 player The sound drops out. • The lens is dirty. Clean it with a commercially available...
Other models in this manual:Home Stereos - CMT-NE5 (305.46 kb)