


Votes - 2, Average rating: 3.5
(


 )
)
|
Photos and specs Panasonic SC-PM500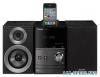 |


manual abstract
specification that will guarantee the above iPhone response. iPhone responses can be different on newer models or with new software. “Made for iPod” and “Made for iPhone” mean that an electronic accessory has been designed to connect specifically to iPod, or iPhone, respectively, and has been certified by the developer to meet Apple performance standards. Apple is not responsible for the operation of this device or its compliance with safety and regulatory standards. Please note that the use of this accessory with iPod, or iPhone may affect wireless performance. iPhone, iPod, iPod classic, iPod nano, and iPod touch are trademarks of Apple Inc., registered in the U.S. and other countries. Radio Manual tuning 1 Press [RADIO, EXT-IN] (main unit: [RADIO/EXT-IN(USB)]) to select “FM” or “AM”. 2 Press [3] or [5] to select the frequency of therequired station. To tune automatically, press and hold the button until the frequency starts changing quickly. When “FM” is selected 1 Press [RADIO MENU] to select “FM MODE”. 2 Press [Y, U] to select “MONO” and then press [OK]. To cancel, select “STEREO”. • “MONO” is also cancelled when you change the frequency. • Switch off “MONO” for normal listening. When “AM” is selected 1 Press [RADIO MENU] to select “B.PROOF”. 2 Press [Y, U] to select “BP 1” or “BP 2” and then press [OK]. Memory presetting 30 FM and 15 AM stations can be preset. Preparation Press [RADIO, EXT-IN] (main unit: [RADIO/EXT-IN(USB)]) to select “FM” or “AM”. Automatic presetting 1 Press [OK] to select “LOWEST” or “CURRENT” frequency. 2 Press [RADIO MENU] to select “A.PRESET” andthen press [OK]. “START?” is shown. 3 Press [OK] to start presetting. Manual presetting 1 Press [3] or [5] to tune in to the station. 2 Press [PROGRAM]. 3 Press the numeric buttons to select a presetnumber. Do steps 1 through 3 again to preset more stations. The new station replaces any station that occupies the same preset number. Selecting a preset station Press the numeric buttons, [2] or [6] (main unit: [2/3] or [5/6]) to select the preset station. AM allocation setting (by main unit only) This system can also receive AM broadcasts allocated in 10 kHz steps. 1 Press [RADIO/EXT-IN(USB)] to select “FM” or “AM”. 2 Press and hold [RADIO/EXT-IN(USB)]. After a few seconds, the display panel shows the current minimum radio frequency. Release the button when the minimum frequency changes. • To go back to the initial setting, do the above steps again. • After you change the setting, preset frequencies are erased. RDS broadcasting This system can show the text data transmitted by the radio data system (RDS) available in some areas. Press [DISPLAY]. PS PTY FREQ >> (Station name) (Program type) (Frequency) Note: RDS may not be available if reception is poor. Clock and timers Setting the clock This is a 24-hour clock. 1 Press [CLOCK/TIMER] to select “CLOCK”. 2 Within 10 seconds, press [R, T] to set the time. 3 Press [OK]. Press [CLOCK/TIMER] to show the clock for a few seconds. Note: Reset the clock regularly to maintain accuracy. Sleep timer The sleep timer switches off the system after the set time. Press [SLEEP] to select the setting (in minutes). To cancel, select “OFF”. 30 MIN > 60 MIN > 90 MIN > 120 MIN > OFF To show the remaining time Press [SLEEP]. Note: • The sleep timer can be used together with the play timer. • The sleep timer always comes first. Be sure not to set an overlap of timers. Play timer You can set the timer to come on at a certain time to wake you up. Switch on the system and set the clock. Prepare the music source you want to listen to (disc, radio, USB, iPod or iPhone) and set the volume. 1 Press [CLOCK/TIMER] to select “#PLAY 1”, “#PLAY 2” or “#PLAY 3”. 2 Within 10 seconds, press [R, T] to set the start time. 3 Press [OK]. 4 Do steps 2 and 3 again to set the end time. To start the timer 5 Press [#, PLAY] to start “#PLAY 1”, “#PLAY 2” or “#PLAY 3”. 6 Press [`] to switch off the system. The system must be switched off for the timer to operate. Do steps 1 through 4 and 6 again (Z above). 1) Press [#, PLAY] two times to remove the timer indicator on the display panel. 2) Change the source or volume. 3) Do steps 5 and 6 (Z above). Press [CLOCK/TIMER] to select “#PLAY 1”, “#PLAY 2” or “#PLAY 3”. Press [#, PLAY] two times to remove the timer indicator on the display panel. Note: • The timer starts at a low volume and increases gradually to the preset level. • The timer comes on at the set time every day if the timer is on. • If you switch off the system and switch on again while a timer is in operation, the timer will not stop at the end time. Change the settings Change the source or volume Check the settings Cancel RQT9537 ENGLISH ENGLISHENGLISH 9 ENGLISH ENGLISHENGLISHENGLISH RQT9537 Sound effects External equipment Connecting to headphones Changing the sound quality 1 Press [SOUND] to select a sound effect. 2 Within 3 seconds, press [Y, U] to select the desired setting. BASS -4 to +4 TREBLE SURROUND “ON SURROUND” or “OFF S...
Other models in this manual:Car Audio - SCPM500EP (2.05 mb)